Forgetting your SD Card for the Camera – Use your iPhone
STREET & BEACH PHOTOGRAPHY UPDATE – IPHONE TIPS
Well, this has actually happened to me on one other occasion and once again, just on my recent holiday trip to Fuerteventura. I am normally very careful but with all of the proceeds of filling in your details for passenger locator forms, Covid jabs, booking in day 2 tests and signing this all up on the Spanish website, I managed to forget my card for the XT3.
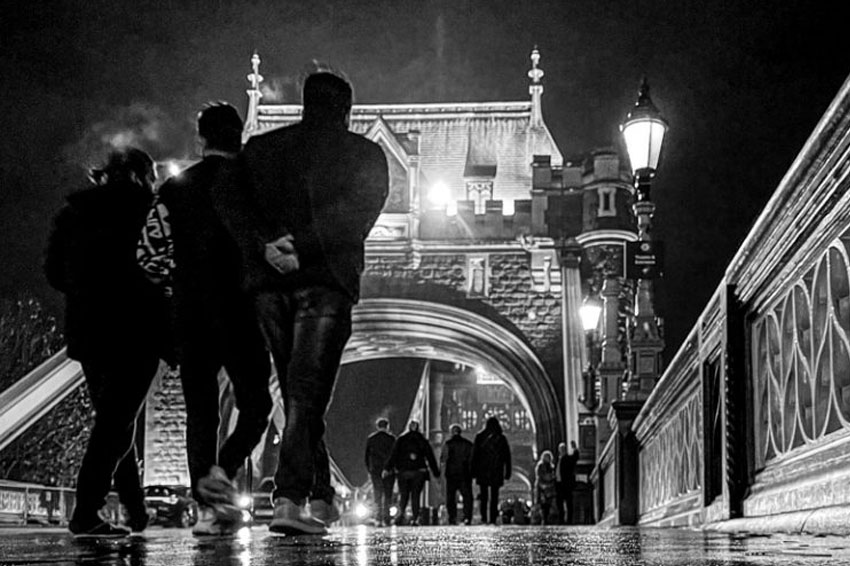
When you leave your camera card at home,
Not a very wise thing to do, and even more so if you do this when working with a client! So I have only done this twice so far, once here and once when going back into photography over ten years ago. I had to zoom off to a shop to find any card to fit my camera for the day – Humiliating!!!

Choosing the Location
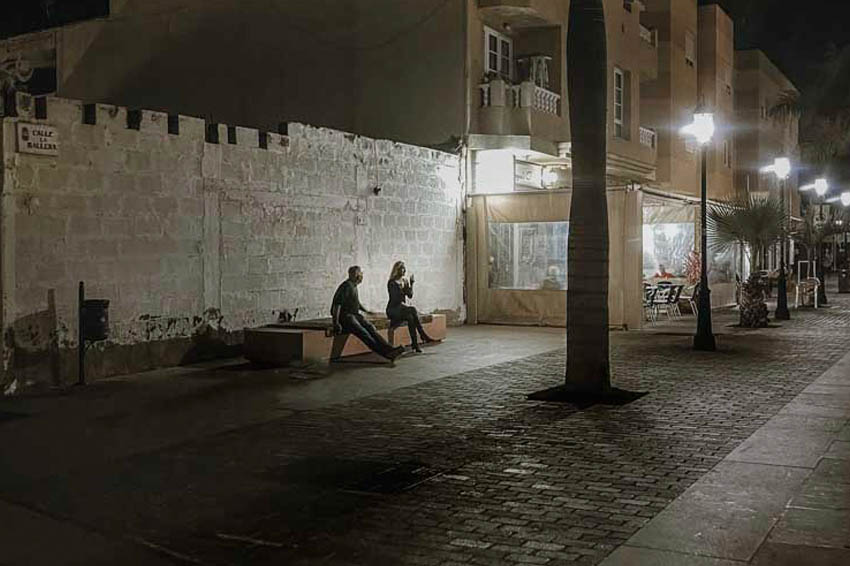
In the old town, it’s a unique place to walk around at night. Many back streets are next to the port but the area has a mid-African feel. I was drawn to one street in particular as it had retro-styled cafes and a one-horse town feel to it. Also, the scene changed on a regular basis with people moving between seats and watching a street show further up the street.

I found the iPhone pictures a little noisy in low light and needed to add a little grain to cover the fact. I use on the fly Lightroom Mobile and another app for black and white called Darkroom both of course from the app store.
Here are some tips for using your phone instead of a camera.
- The iPhone Portrait mode is a photo effect that blurs the background of an image by adding a simulated bokeh. This background blur isolates the subject in a photo and gives it a more professional look. Portrait mode provides similar results to the ones you get when using a DSLR camera. Switch to Portrait mode by swiping on the slider at the bottom until you land on Portrait mode. Once you’re in Portrait mode, follow the on-screen prompts that let you know if you’re too close or too far from your subject or if you need to add more light to the picture.
- When activating Burst Mode, you don’t have to change any of your iPhone camera settings. All you have to do is press and hold the shutter button. With an iPhone camera 11 or higher, tap the shutter button and immediately slide it to the left for portrait-oriented photos or drag it up for landscape orientation. Your device will then keep taking pictures as long as your finger touches the screen. Burst Mode takes approximately ten photos per second.

If you’re not too confident about your exposure settings, activate High Dynamic Range (HDR). It will allow you to capture highlights and shadows you can’t do with regular exposure. When you use HDR, your phone automatically takes three images. You get regular exposure. And you also get one that’s underexposed and another that’s overexposed. The app then combines those pictures together into one frame. You’ll have better lighting and more details in your photo.
iPhone HDR takes several exposures in one go, so it’s best to place your phone on a tripod for best results. If you shake your camera while the shutter’s open, there’s a potential that the final photo will look blurry. I shot everything handheld and for some reason the camera had its own setting which set the shutter to seconds and built up the image I found this infuriating and eventually found how to switch this off!

How to Use iPhone Night Mode If you need a Tripod
Apple has made using iPhone Night mode easy. Follow these step-by-step instructions to use it:
- Open the camera app on iPhone 11 or iPhone 11 Pro.
- Tap the moon icon in the top left corner (next to the Flash). It will turn yellow when enabled. If the icon is grey, Night mode is available but not auto-enabled.
- Set the scene and use iPhone photography tips to arrange the composition.
- 4. Use the timer dial above the Shutter Button to adjust exposure time in seconds. This is how long the camera must be stabilized in order to take the photo.
- When ready, tap the Shutter Button and take the photo.
The iPhone camera software will automatically default to the exposure time it deems best. You can, however, manually adjust this up and down to change the look.
Hold your finger on the screen to lock the focus.
When you frame a shot with your iPhone, the camera will work its magic to set the focus automatically. This feature is useful, but it’s not perfect. If you want to ensure that the camera focuses on what you want it to, you’ll need to use the lock focus feature. Point your camera at your subject and press your finger on the area you want the camera to focus on. Hold your finger until the focus locks in place. You will see the AE/AF lock on the screen. Tap the shutter button to take a photo.a

Manually adjust exposure
Although the iPhone features a fixed aperture, it’s still possible to manually adjust the exposure, which is basically a way of changing the ISO and shutter speed values. Unfortunately, there’s no individual control over such values, and you have to simply rely on an exposure slider.
To adjust exposure, tap to focus, and then slide up or down on the viewfinder. You’ll see the exposure slider move along with your swipes, and you’ll notice the image become overexposed, or underexposed, depending on which way you move the slider.
Get in close
Instead of relying on digital zoom, move closer to your subject. Not only will this let you capture objects up close, but it also lets you take advantage of the iPhone’s f/2.2 aperture. Getting in close and focusing on an object in the foreground or background creates a separation that allows for that shallow depth of field.
Use AE/AF lock
Instead of just tapping to focus, tap and hold on to the viewfinder to lock the exposure and the focus. While locked, you can use the exposure slider to change exposure while maintaining a locked focus.